Introduction
In Install Tomcat on your Mac, we learned how to install a Tomcat server on our Mac. Now, to develop Java applications in Eclipse for that server, we must tell the IDE about it. If you do not have Eclipse installed on your Mac, visit Eclipse IDE for Java EE Developers.
New Server
Adding a server to Eclipse is easy. Open the File > New > Other... menu, or simply press ⌘N. In the dialog that opens, select the 'Server' wizard:


Yay! We have finished adding an external Tomcat server to our Eclipse workspace.
Verify New Server
Let's confirm that Eclipse recognizes and can control the server. Show the 'Servers' view by opening the Window > Show View > Servers menu. The 'Servers' view appears as a tab in the Java EE (default) perspective:
 Notice there are buttons to start the server in various modes. Click the 'Start the server' button (circled in red):
 The status message for the server will change to say something like this:
 This is not the confirmation page we expected. What's going on? The server is obviously running, as evidenced by the footer ("Apache Tomcat/7.0.29"). However, the confirmation page cannot be found. Where is Tomcat looking for its files?
Run Configuration
The most straightforward way to answer this question is to look at the command being used to launch Tomcat. Eclipse uses a run configuration to dynamically construct a command from various inputs specified. To view all run configurations, open the Run > Run Configurations... menu:
 Yay! There indeed exists a run configuration for our Tomcat server, under the 'Apache Tomcat' group. Select our server and then click the 'Arguments' tab. This will expose the 'VM arguments' used to start the server:
 (Circled in red.) There are many arguments listed here. The leading -D before each one is how Java arguments are specified on the command line. Ignore them to examine the name of each property and its value.
The most important property for us right now is wtp.deploy. This specifies the WTP deployment directory, which is where Tomcat looks for web applications. The value of this property will by default be the .metadata/.plugins/org.eclipse.wst.server.core/tmp0/wtpwebapps subdirectory of your Eclipse workspace.
Let's see what's in there. Open a Terminal window and type:
Let's navigate to that directory and list its contents:
Server Overview
An alternative to looking at the run configuration is to open the server's 'Overview' pane by double-clicking our server in the 'Servers' tab:
 (Circled in red.) Looking closer, we see the path to the deployment directory is visible in the 'Server Locations' panel:


Index Page
Let's create a page to be served. In the Terminal window, type the following command:


Let's confirm that Eclipse recognizes and can control the server. Show the 'Servers' view by opening the Window > Show View > Servers menu. The 'Servers' view appears as a tab in the Java EE (default) perspective:


Tomcat v7.0 Server at localhost [Started, Synchronized]So, has it really started? Let's confirm. In the previous post, we confirmed Tomcat was running by pointing our browser to http://localhost:8080/ and viewing a confirmation page. Let's try again. This time you should see something like this:

Run Configuration
The most straightforward way to answer this question is to look at the command being used to launch Tomcat. Eclipse uses a run configuration to dynamically construct a command from various inputs specified. To view all run configurations, open the Run > Run Configurations... menu:


The most important property for us right now is wtp.deploy. This specifies the WTP deployment directory, which is where Tomcat looks for web applications. The value of this property will by default be the .metadata/.plugins/org.eclipse.wst.server.core/tmp0/wtpwebapps subdirectory of your Eclipse workspace.
Let's see what's in there. Open a Terminal window and type:
$ cd <path_to_workspace>(Replacing path_to_workspace with your own.) This will change directories to the deployment directory. Let's list its contents. In your Terminal window type:$ cd .metadata/.plugins/org.eclipse.wst.server.core/tmp0/wtpwebapps
$ lsThe ROOT directory is the default document base for Tomcat (also known as the context root). In other words, Tomcat will look in the ROOT folder for all requests, unless another web app has been configured. This includes the simple root request "/" itself.
ROOT
Let's navigate to that directory and list its contents:
$ cd ROOTAs you can see, there is nothing here besides the WEB-INF directory. This explains why we see the HTTP 404 error page when we point to http://localhost:8080/ -- no file can be found!
$ ls
WEB-INF
Server Overview
An alternative to looking at the run configuration is to open the server's 'Overview' pane by double-clicking our server in the 'Servers' tab:


(Circled in red). Notice the radio button for 'Use custom location'. Click that to reveal the server path:

(Circled in red.) Yay! It is .metadata/.plugins/org.eclipse.wst.server.core/tmp0/wtpwebapps, just as we expected. Click the 'Use workspace metadata' radio button to restore the original setting.
Index Page
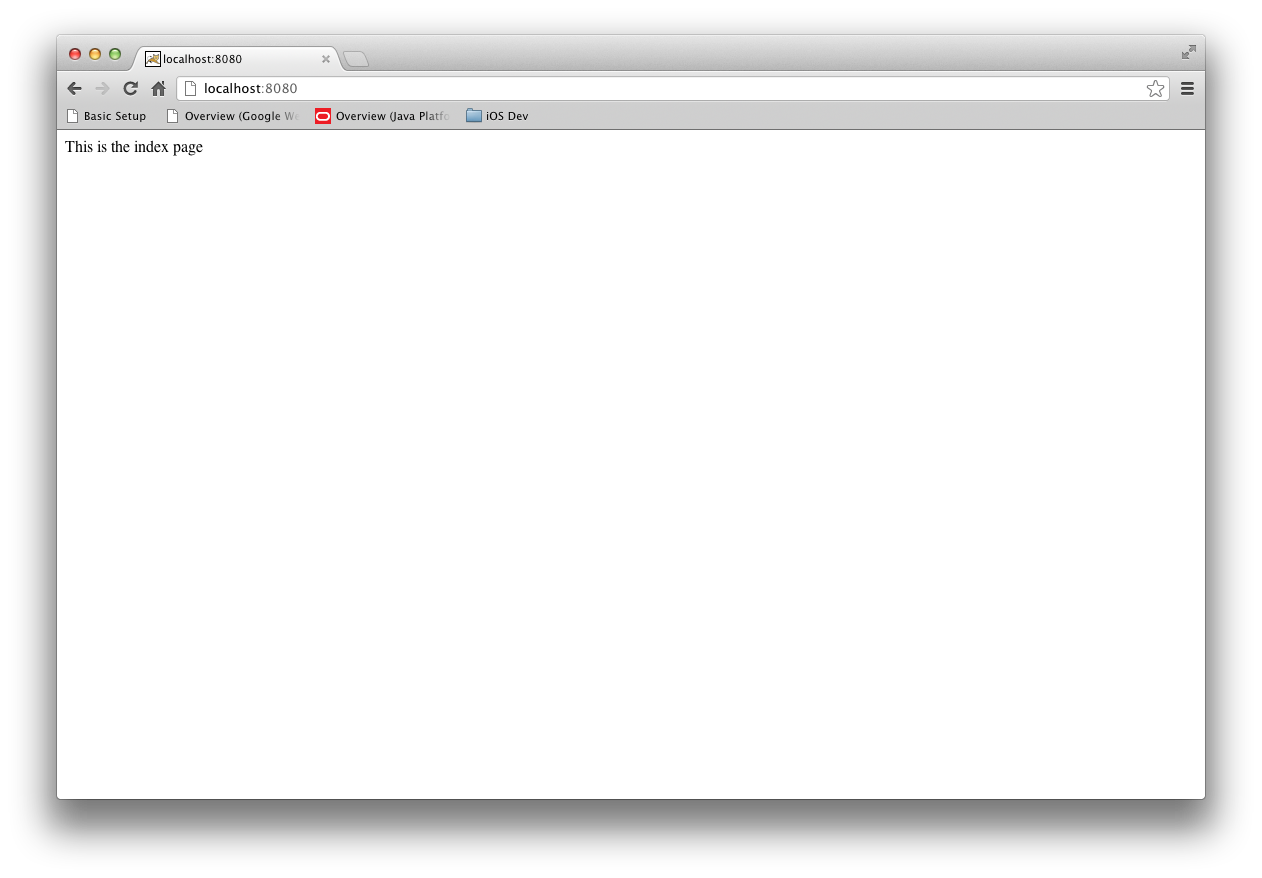
Let's create a page to be served. In the Terminal window, type the following command:
$ echo 'This is the index page' > index.html
This should create an index.html page to be served when users navigate to http://localhost:8080/. Refresh the browser to confirm:
Yay! We have verified our Tomcat server installation.
Finally, you may stop the server by clicking the 'Stop the server' icon in the 'Servers' tab:

(Circled in red.) The server status will change to something like this:
Tomcat v7.0 Server at localhost [Stopped, Synchronized]You may exit Eclipse when you are done.