Introduction
So, you can't get that catchy tune out of your head? Make it your ringtone! This post will explain the simple steps to make free custom ringtones of your favorite songs.
Creating the Ringtone Clip
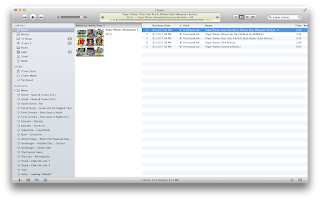
The first step to making a custom ringtone is to launch iTunes and locate the song in your library. For this example we will be using "Paper Planes" by M.I.A.:
 Now, right-click the desired song and select 'Get Info' (or simply press ⌘I) to open the properties dialog. Then, select the 'Options' tab:
 Notice there are two check boxes for 'Start Time' and 'Stop Time'. Set these both according to which part of the song you wish to sample for your ringtone, up to a maximum of 30 seconds in duration. For this example, we will simply choose the first 30 seconds of the song:
 (Circled in red.) Click 'Ok' to close the dialog and return to your iTunes library. Then, right-click the song again and select 'Create AAC Version', or select 'Create AAC Version' from the Advanced menu. iTunes will automatically create a new 30-second AAC audio file from the original song:
 (Circled in red.) Yay! We have created the ringtone clip. Restore the settings of the original song by going back to the 'Options' dialog and un-checking 'Start Time' and 'Stop Time'.
Change File Extension
Now we have a 30-second clip of the song we wish to use as the ringtone. The problem is that iTunes doesn't recognize it as a ringtone because the file has an '.m4a' extension. This can be seen by selecting the clip and viewing its info:
 (Circled in red). To fix this, right-click the clip and select 'Show in Finder', or select 'Show in Finder' from the File menu. Then, rename the song so that it has an '.m4r' extension:
 (Circled in red.) When you are done renaming, you will see a dialog confirming you wish to make the change:
 Click 'Use .m4r' to accept the change. Yay! We have successfully changed the file extension.
Import as Ringtone
We changed the extension, but iTunes still thinks our clip is an 'AAC audio file'. To see this, select the clip in iTunes and open the info dialog. Notice the extension is '.m4r' but the Kind attribute is still 'AAC audio file':
 (Circled in red.) To fix this, we will first need to remove the clip from the library, and then we will import it back.
Close the info dialog and return to iTunes. Select the clip and press the 'Delete' key, or select 'Delete' from the Edit menu. iTunes will ask you to confirm the deletion with the following dialog:
 Click 'Delete Song' to confirm you wish to remove the clip from your iTunes library. As a secondary precaution, iTunes will then ask if you wish to keep the file on disk or move it to the Trash:
 Click 'Keep File' so that we can still view our clip in the Finder window. Then, return to the Finder window and double-click the clip (with '.m4r' extension). iTunes will automatically recognize it as a ringtone, and file it under the Tones tab of iTunes:
 Yay! We have imported the clip into iTunes as a ringtone. Now you can set the ringtone on your iPhone as you normally would.
So, you can't get that catchy tune out of your head? Make it your ringtone! This post will explain the simple steps to make free custom ringtones of your favorite songs.
Creating the Ringtone Clip
The first step to making a custom ringtone is to launch iTunes and locate the song in your library. For this example we will be using "Paper Planes" by M.I.A.:


Change File Extension
Now we have a 30-second clip of the song we wish to use as the ringtone. The problem is that iTunes doesn't recognize it as a ringtone because the file has an '.m4a' extension. This can be seen by selecting the clip and viewing its info:


Import as Ringtone
We changed the extension, but iTunes still thinks our clip is an 'AAC audio file'. To see this, select the clip in iTunes and open the info dialog. Notice the extension is '.m4r' but the Kind attribute is still 'AAC audio file':

Close the info dialog and return to iTunes. Select the clip and press the 'Delete' key, or select 'Delete' from the Edit menu. iTunes will ask you to confirm the deletion with the following dialog:


